Me being Mom

Me being Mom
photo by Anna Marie Pictorials
Showing posts with label DIY. Show all posts

Sunday, September 30, 2012

Shower Power

Yesterday I helped host a baby shower for my sister. This is her first child and I don't think I know a more capable couple. I'm so happy for them and am so happy to have been a part of their special day.... Ok. enough of the niceties. Let's get on to the details of this shower, shall we?


First of all, we couldn't have a guest BOOK... we had to do things a little differently. I like keepsakes that you can showcase. Books are great if you want to read one but honestly, how often are you going to pull your baby book off of the shelf and read through it? Ok. So maybe you're the Mom who sits for hours and reminisces over these happy days. I don't have time for that. I'd rather have this fancy shcmancy tree hanging on the wall to look at as I'm making my 100th trip to the laundry room for the week. We could've had people write their names next to their fingerprint but the powers that be said it would look sloppy. Umm. It's fingerprints.... meaning they're not exactly neat.


I don't know where my ideas come from. Pinterest? Maybe. I see things there and say "Hmm. I think I can do better." No offense but I'm going to take an idea and run away with it and change my mind a million times. While planning this shower I couldn't give an honest answer regarding the theme because in all actuality, I had no idea where I was going with it. I knew there had to be a tree though. SO, I took paper bags from my many trips to the grocery store and constructed this tree in my dining room. Over a three or so week period I stared at it and thought about how to make it whimsy. I think it turned out well.


I had to hang something for the eye to follow across this big blank wall so I made these onsies out of scrapbook paper. Some were blank, some had bible verses and quotes and others were adorned with old buttons, ribbons and cute appliques. I personally love the color combo. My sister isn't big on the whole PINK thing so I wanted to put more green in. I chose different shades of green and pink for the leaves because it is early fall after all.


Here are a few more pictures to give you an idea of how I decorated the rest of the space. Enjoy! :)
 

Wednesday, July 11, 2012

Time out...

I have no patience at all. Sitting on a beach, waiting for the sun to set has been something I've wanted to do but didn't have the patience to actually sit and do. And honestly, I didn't even take the time to do that when I took this picture. I took it as we were driving by the beach... I didn't even roll my window down.

I think sometimes you just have to stop what you're doing and let everything fall to the wayside. Take the time to sit and appreciate the natural beauty that surrounds you! The setting sun, the kids playing at the park.... don't be the creeper that shows up to the park without a kid though...awkward!


I recently took the time to sit on my back porch/deck to enjoy a cup of coffee. My intentions that morning were simple. Make a pot of coffee, sit on the porch and plan out my sisters baby shower. I do my best planning when I am alone and don't have 10 people shouting/whispering ideas into my ears. I need to sit back and think about why we're having this baby shower. To celebrate life. This is about my sister and her husband, the best couple you'll ever meet and one of the most deserving set of parents in the world. I love them to pieces and want this shower to represent who they are to me.

They are the calm without the storm, a ray of sunshine during the darkest of days and a long traveled somewhat bumpy road. The journey for them to become parents has not been easy and I'm so happy to finally be a part of a special day where friends and family from both sides will gather and show some love.

If you have something on your mind, stress is taking over and you can't think straight sometimes its best to remove yourself from the situation for a bit. I'm not saying that you should pack a bag, hop in your car and run away...although at times that does seem like an exhilarating experience. I'm saying, shut the phone off, make a picnic lunch and head down to the beach and watch the waves come in. Let everything else wait! ME TIME is so important! Try it. If it doesn't work, try again and again.

When my boys were little and I would get overwhelmed I wouldn't always handle it with grace but when I did deal with it.... sounds like one of those pins on pinterest....I don't always keep my cool but when I do it involves chocolate cupcakes! Yeah! That's what I said! I made a batch of chocolate cupcakes and put fancy frosting on them. I listened to music and danced in the kitchen while I baked them. We had a lot of cupcakes!

Sure, when all of the cupcakes were gone and reality set in I still had bills I couldn't pay and people I wanted to punch in the face but I was refreshed and felt more capable of handling the situation without pulling my hair out!

You see what I'm saying? Time out! Breathe! Clear your mind! Back to work!

Anyway, find that thing that simmers the raging inferno of frustration and feed on it when you get stressed. Wait! Maybe that was bad. Don't turn to stress eating to make you feel better! I would never suggest that you use food like that! OK. I'm going now before I encourage you to do something even worse...


Tuesday, February 28, 2012

An Inspiration To Us All

I am looking for people who have chased down a dream! My plan is to share stories of people who have followed their heart and made a dream of their own come true or you can throw someone else out there if you know someone who has followed a dream. Maybe you decided when you were a kid that you wanted to rescue animals and when you grew up you made it happen. Or maybe you wanted to cross ballroom dancing or become a ninja off of your list! I want to hear about it and share inspirational stories with others. If you're game please leave a comment! If not fine..... I will hunt people down myself! I have a few victims in mind already! Mwahaha!

Thursday, February 9, 2012

Get a Theme Song

Do you suffer from severe negativity? Do your facebook status updates read like a broken record, reporting over and over that your life sucks and you're tired of being used and unhappy? Well, YOU my friend need to get a theme song!

I have a theme song!


And when I'm out and about, picking the kids up, grocery shopping or at home doing my thing I'm imagining that this song is playing! If they made a movie of my life this song would definitely be playing at some point in the movie!

I think a song can set the mood. If you watch the Ultimate Fighter competitions you'll notice that the fighters make their way to the octagon while a song blasts over the PA system. The fighter or his manager or whoever picks a song that will set the mood or simply say "I'm a bad ass MO FO! And I'm going to put my knee in your eye socket!".

So, do you see what I'm saying? If you have a theme song to keep you motivated or positive you might be happier. Stop letting other people influence your mood and take your happiness into your own hands by choosing your own theme song. Heck, I have an entire soundtrack! I listen to it all the time. Sometimes I have to change it up a bit and add new songs as they come out but, I keep a positive stream of music playing to keep my mood out of the ditch!

You are the master of your own universe! You can choose to do the things that make you happy or you can depend on others to make you happy. But, I'll tell you this........That person can take off in a heartbeat and then you're left not knowing how to make yourself happy!

What's your THEME SONG?

Thursday, February 2, 2012

Working It Out

I recently started sweating at the gym with my sister and my cousin. If you read my previous post you know that I did it for various reasons. Most importantly, it was to help myself live longer. I changed my eating habits. Cut out sweets to a certain extent.....I still drink an occasional Mt. Dew with tons of ice. But, one of the perks of this new journey I've set out on......reconnecting with my girls.

I got married in August. When I started planning the wedding I had 4 bridesmaids in mind. When I walked down the aisle I followed only 3. One of my bridesmaids and I grew apart for a short time while I was planning my wedding. She had so much going on in her own life that I didn't feel like her heart was in it and I also didn't agree with the choices she was making. I was wrong to think that my opinion mattered. I'm not saying that as a smart @ss. I am saying, it was not my place to judge. The deadline came to order my wedding flowers. I had to make a choice. Once I put in that order I couldn't take it back. I didn't want my Mom to pay for a bridesmaid bouquet when the bridesmaid didn't even have the dress. So, I had to make a decision. Do I tell my rogue bridesmaid to forget about her commitment or do I say "listen! I'm not happy with the effort you're putting out here! Get your ass in gear and get your friggin' dress!"? I chose to tell her to forget about it. In hind sight, I should've told her I was disappointed (as if anyone wants to hear that they're disappointing you) because I really think she didn't mean to not jump when I asked......lol.....That sounded bridezilla-like. Anyway, you can't go back. So we go forward and repair what we can. Shoulda, Coulda and Woulda!

My cousin, the rogue bridesmaid, is such a sweet heart! She would give you the world if you told her it would make you happy. She also got dealt a crappy hand in her first marriage, suffered some low self esteem and still has trust issues. You gotta love her for pulling through. I couldn't let our relationship fall away. I love the time we have together. So, when the opportunity came up to start working out with her and my sister at the gym, I had to do it. And I'm so happy that I did! It has been so nice to get back on track with her. She is the size of a supermodel, minus the height, so trotting next to her on a treadmill is a bit daunting and I'll be honest there are times when I want to push her off balance. But, overall, it has been the best part of going to the gym!

Not only am I re-connecting with her and my sister. But, I feel so energized afterwards. Talk about a stress reducer! I leave the house and all the stress of the unfinished laundry and housework behind, walk a few miles on the treadmill or pump my legs on the elliptical and when I get home I suddenly don't care anymore! I just feel better! My problems don't disappear........but suddenly I feel like it doesn't matter as much! If you've found yourself in a slump I would highly recommend that you get physical! Get your blood pumping. You never know what you can achieve in the process!

Sunday, January 22, 2012

Lovin' from the Oven

Let me start by saying I am so sorry! Because if you're like me and you love cinnamon buns you're going to try these tasty rolls and not be able to stop eating them! But, I'm getting ahead of myself.

First off........Let me tell you a little something about my Mom.

One of the smaller rolls.......It's not small at all!
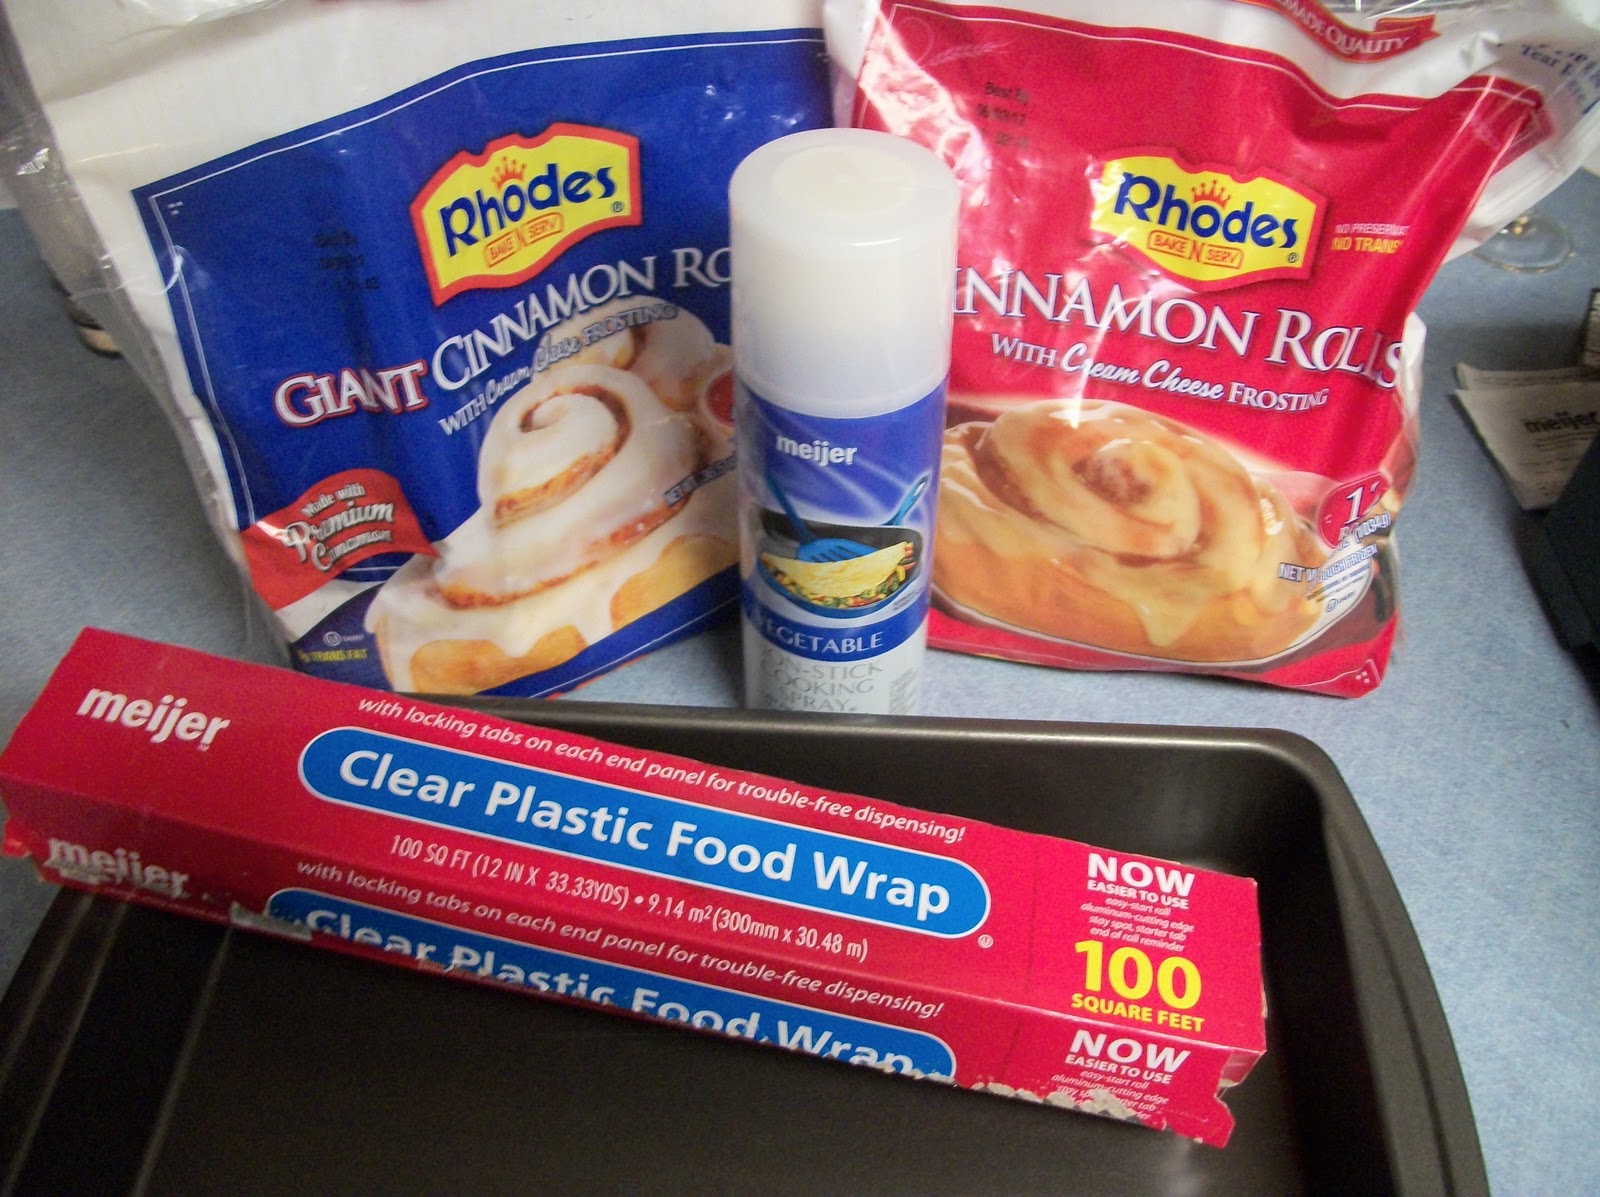
She makes the best bread! I can't make bread. There's something about the kneading and rising and yeast and all that that doesn't agree with me. It never rises and it's just too much like chemistry. I failed chemistry!  So I stay away from it. But as I was killing time in the frozen food section of our local grocery store I ran across these frozen cinnamon rolls. It could just be coincidence but I was just thinking of how much I missed my Moms home made cinnamon buns! [exhale] Sooooooo goooooood! She would start with all of the ingredients she needed, mix it all together, throw in a pinch of love, let it rise, roll it out, add some Cinnamon and brown sugar.....or whatever it is that makes them ooey and gooey and in the end we would have these beautiful cinnamon buns that melt in your mouth. You could go get a can of cinnamon rolls and make those but it's just not the same. They aren't soft and chewy and it seems like they get hard if you let them set out for a while. Anyway.

I miss my Mom. I'd have to drive 12 hours to get a taste of her cooking. So, when I ran across these buns I said, maybe this is the next best thing. So, I bought a bag and made them. It was so easy! You just pop them on a sprayed pan, cover with plastic wrap (sprayed with cooking spray) and let them sit on your counter for 4-6 hours to rise. That was the fun part......watching them get enormous! The hardest part of the process was spraying the plastic wrap. For some reason my common sense shut down when it came time to do that part and I tried to spray the cooking spray on the plastic wrap before I even ripped it off the roll.....anyway, it was a mess. So, I threw that disaster in the trash and started over, ripping a piece of plastic wrap big enough to cover the pan off, layed it on top of the pan like I was covering it, then I sprayed the plastic wrap with spray and flipped it over to fit on top......etc. etc. You know what I mean right?


The smaller rolls, frozen, ready to rise!

You might be asking, "What's the difference in the blue bag and the red bag?" Well, I'll tell you.....The red bag has 12 small rolls and when I say small rolls, I mean bigger than your fist! The blue bag has 6 rolls that are bigger than a tea saucer! The things are HUGE! I should also mention they come with a couple packets of icing. You just thaw it on the counter while the rolls are rising.
So, here you see 9 rolls, fresh from the freezer, placed in a cake pan that has been sprayed with cooking spray and then covered with the plastic wrap that I had a hard time spraying.....I'm not perfect remember!

smaller rolls ready for the oven! mmmm
I placed the pan of rolls on my kitchen counter and left them there all day to thaw and rise. I didn't think they would get much bigger but it turns out I was wrong! -----------> Pre-oven!

I think it's safe to say there will be enough to feed my 2 teenage boys, my husband and my appetite for homemade cinnamon rolls!

Over all, these rolls, are perfect. The price was right. (Under 4 bucks) They were very easy to make! Smelled great! Tasted almost as good as my Moms rolls and put a smile on my face. If you love a fresh baked cinnamon roll but lack the talent, like me, you have to try these! And no! The company is not paying me to give this product 2 thumbs up! But I wouldn't turn down a couple bags of these rolls if they wanted to send them to me!

Sunday, January 15, 2012

Yes GOD, you were right!

Every once in a while I have to be reminded that life is not as bad as it could be and that I need to embrace it as it is. This is my theory. God sends me messages........please don't think I'm nuts.....well, actually I do tend to fall of my rocker occasionally. But this time, it's a legit belief! I've messed up my back, need physical therapy. But let's rewind a bit to the beginning of December. I was stressed beyond belief over finances, not being able to find a job that will work around my MOM schedule (driving the kids to and from school, taking care of the toddler without employing a daycare) and feeling FAT (I've gained a bit of weight in the past few months, about 20 lbs!!!) So, I was feeling like life was not where I needed it to be. I started doing a little walking with the toddler, dancing around the house more, ignored the fact that we couldn't even afford the everyday essentials and focused on the reasons that employers might find to not hire me and tried to improve on them. I was looking at a half full glass. No more half emptiness for me! Then I woke up one day and thought "Hmmmm, my back is a little stiff!" As the days went by the stiffness turned to pain. And by christmas I was miserable and ironically as I type this I'm listening to the acoustic version of Marroon 5 singing Misery..."I am in Misery, ain't nobody who can comfort me"...........bahaha!, not being able to move for fear that my back would spasm. I was eating advil like they were skittles (taste the rainbow.....sorry, I can't say skittles without saying that.....doh! Taste the rainbow!) Anyhooo, So, to GOD I say, Yes, I realize my life could be worse, thank you for reminding me. But is there any chance I could possibly get the use of my legs back anytime soon? If that's asking too much could I just be able to put on my own pants without crying? I have a kitchen full of pots and pans, food that hasn't been put back in it's place for a month. I'd love to be able to do that without asking for help. Or maybe that's the point of all of this. You want me to ask for help.............this could be a problem. I don't want help. I want to do it myself. I guess sometimes you just have to welcome help when it's offered. I don't have to like it though. But I am grateful. And a special thanks goes out to Adam Levine for singing me to sleep last night! You totally relaxed me.........ahhhh! The husband seemed to sleep better too!

Wednesday, January 11, 2012

Life's a Beach....a simple beach wedding

June 2011.......My sister got married. It was a simple Beach Wedding at Weko Beach in Bridgman Michigan but don't let the term "simple" fool you. It was a beautiful occasion. I was recently contacted by a bride who needed help with wedding invites and also needed ideas for a beach wedding. And of course my sisters wedding was the first thing that popped into my head. So, I'm sharing some pics with her and YOU!

Getting a few shots before the big event!
The Bridesmaids wore black and walked the walk barefoot. The Groomsmen wore white and khaki. The ring bearer was the cutest darn thing in white and khaki, carrying a ring box that looked like a treasure chest, made by ME.
I was one of the bridesmaids and I have to say that other than my sister looking so beautiful and happy, my favorite part was when I heard the Grooms sister playing her guitar as I walked down the beach to meet everyone at the alter. The soft music coming from that guitar mixed in with the sound of the water was so beautiful.
Who says you can't make your own bouquet?
 I used flowers and plants that we had around the house or in other folks yard to make the bouquets. White Peonies, Hosta leaves, beach grass and Sedum. On the stems I wrapped white ribbon which we saved from my Uncles funeral flowers........No that's not creepy! And to add dimension I added a narrow black ribbon on top of the white. Sorry I don't have pics of that aspect.

The Man of the hour and his Men.

Just thought this said it all "carefree"

My beautiful sister.....the Bride.
Afterwards everyone met up at a local tavern for drinks and cake. The cake was so flipping adorable, made by the Grooms sister! I'm telling ya, we are a talented bunch! Overall it was a momentous occasion that I am proud to say I was a part of! Hope this gives you some wedding inspiration and enforces the theory that you can have a simple, stress free wedding!


Treasure Chest Card box to match ring box & The glass jug was for
honeymoon donations!


Tuesday, January 3, 2012

Red and Black Inspiration

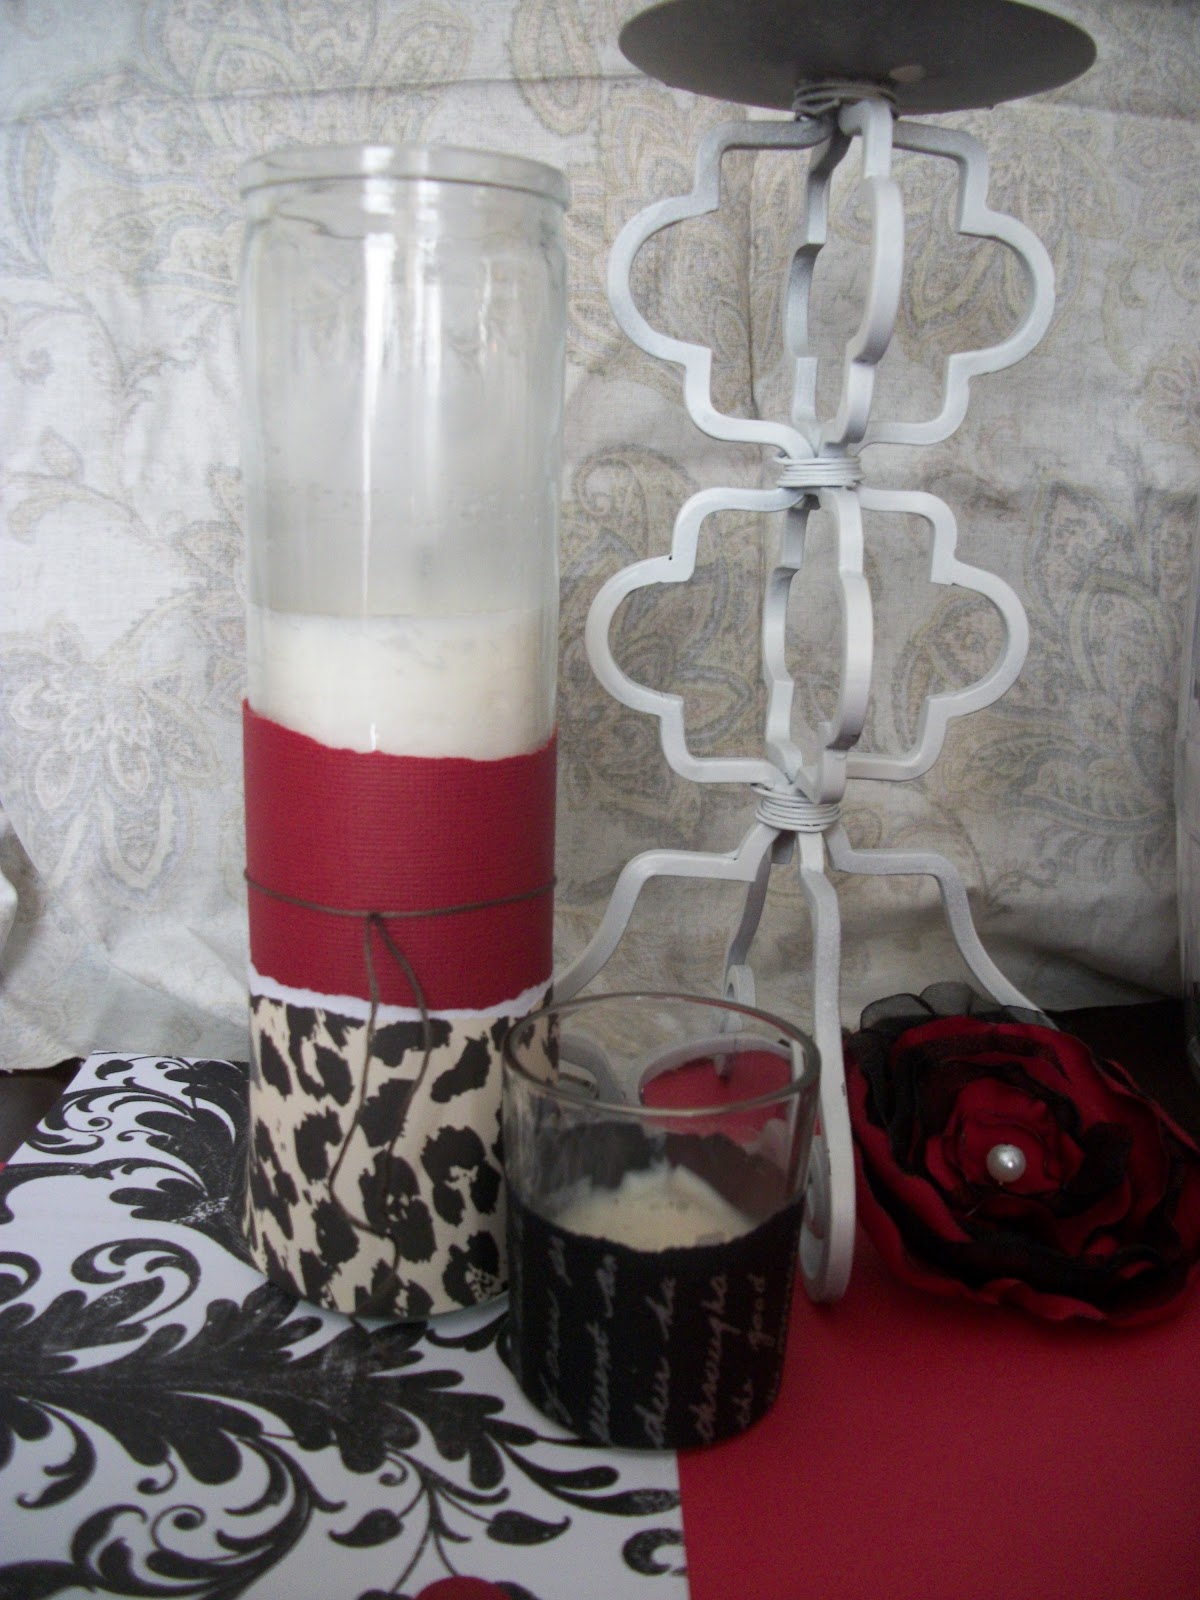
So, I was playing around with some red and black paper and leftovers from my own wedding, making an example piece for a friend of the family. This is what I came up with. Keep in mind, There was suppose to be a cylindrical vase for a pillar candle but.......it was broken! So, I had to keep that out of the equation.
The random piece of embroidery thread is suppose to be black ribbon. Or white.
I had neither!

Monday, January 2, 2012

Cupcake Pix Tutorial

I get bored. I have to keep my hands moving. When I was planning my wedding I had scraps and scraps of paper left over from the invites and save the dates and etc etc that I made. I didn't like the idea of throwing the scraps away. I'm frugal like that! I had some drink stir sticks left over from a different project. So, together with the scraps I made some pretty fancy pix for my cupcakes. I also make them to stick in sandwiches and pie when I am home alone and want to feel like I'm celebrating something.

Here's what I used: A paper trimmer, scissors, hot glue gun, drink stir sticks and 8x11 scrapbook paper or any paper that you have that you can cut into strips..... (To get the lace trimmed flags I used a Martha Stewart paper edger that I found on clearance at Micheals craft store)

First, Cut your paper into strips using your paper trimmer. They don't have to be the same width. I like to mix it up a bit. Skinny, fat etc.


The stir sticks I used were longer than I wanted my pix to be. So, I cut them shorter while my hot glue gun was heating up. You can also use toothpicks but I happened to have the stir sticks left over from something else, waste not, want not!

Now that you have your sticks cut and your glue gun is hot, take your strips of paper and cut them into sections. I make sure not to make a crease in my paper.

Once you have your pieces cut, put a little got glue on the center of your strips like soo....

 While the glue is nice and sticky take your stick and place it in the glue before it loses its gooeyness. Now twist your stick a little to coat it with the hot glue all over the tip and fold your paper so it closes over the tip like a book closing on a book mark (Make sense?)........

When you're all done with that step the easy part begins. I did this while I sat on the couch, watching Trueblood. Use your scissors to cut a "V" shape in your flag. Or use your paper edger to make a fancy edge.

If you want to dress them up and personalize them you could always add a glittery initial sticker to the flag! I kept mine plain. I wouldn't recommend that you use glitter on the flags! There's a chance that the glitter will fall into your icing or drink if you're using them as drink markers. And I am sure it wouldn't taste good!

 I'm sorry I didn't make cupcakes to stick these beauties in! I really wish Iwould've now that I think about it! I've wanted orange cupcakes with a cream cheese frosting for a while now!  

Cupcake Pix

 I am sharing these photos with you because a friend of mine needed ideas for cupcake decorations for an upcoming party she is throwing for a co-worker! I love cupcake pix! These pix in particular were super easy and who doesn't like easy when it comes to DIY?  In a few days I will be posting the Tutorial so you can make your own!

The Card Box

When I got married I wanted a unique card box that could be re-used after the wedding reception. So I did a little research. I'm a DIY type of gal so I decided I would make my own. But then I found this card box and realized that I know squat about working with wood and power tools. And I also didn't want to be the bride walking down the aisle with a missing hand. So I did what I could and delegated this project to my Mom who delegated to her friend the carpenter! He built the box and I painted it to look like a garage.

See, my husband is a mechanic! So, I thought instead of making a card box that looked like a house, you've probably seen them on etsy......It would be way cooler if we had a garage! So, here it is! Isn't it adorable!? Now that the wedding is over with, I use it to store the toddlers extra toys! It looks cute sitting in my living room! The roof of the box is painted with chalkboard paint! And it's lots of fun to see what people write on it when they come to visit now! And it keeps the toddler busy sometimes! I used my computer to make a sign to place on the front of the garage just like a real garage would have. This box is heavy duty so it will last a lifetime. I can pass it down to the kids or keep it forever and ever and ever!

I hope this has inspired you do think outside of the box so to speak when you're planning your own celebration. Try to use things that have a dual purpose! If you can't make it yourself then maybe you know someone who can! If your local high school still offers its students a wood working class, call the school and ask if they would be interested in taking on the project! Schools can always use generous donations! Just a thought!

DIY Dry Erase Board

Here's a useless fact about myself that you could probably go your entire life without knowing.......I use to work at a hospital. (Best Bunch of gals I ever had the pleasure of working with!) Anyway, one of the things I loved about my job there besides the gals I chummed it up with was.....wait for it because it's going to be the silliest thing.......the dry erase board! In the Nurses Station there was a massive dry erase board where the Unit Clerk would write the days line up. You know, that way everyone knew which Nurse and Assistant was assigned to which patients etc. I loved to doodle on that board. An inspirational saying or funny picture! It was fun! But it was ugly! 

Anyway, another useless fact.....I love to leave funny notes for my kids and hubby in the house. Occasionally, I might leave a note to remind them that I enjoy a clean living room floor or that I think they are the best family in the history of ALL families. Or maybe a funny qoute or fun fact. But, I don't have an ugly dry erase board! Oh! NO I do not! I made a fancy dry erase board because I am crafty like that!  And I also happened to have an empty frame hanging on my wall that needed something in it.......but I'm getting ahead of myself.

Did you know that you can use dry erase markers on glass just like you would on the dry erase boards? Of course you did! You can also use them on a mirror! How cool is that? So, don't be surprised if you walk into my bathroom and see "Clean the toilet" written on the mirror! And how cool would it be to have a Chore board for each kid in your house that looks good and trendy! It's super easy to make! The hardest part was hanging the frame straight......I have crooked frame syndrome! Don't laugh! It exists!

I used fabric left over from my wedding.....but use fancy paper if you want!
So, basically if you can put a picture in a frame......you can make this dry erase board! I cut my fabric to fit the frame, placed it in the frame, pretty side up and then replaced the back of the frame. DONE!

Thursday, December 29, 2011

You are my Sunshine

My Aunt & Sister
I've been lucky enough in my lifetime to know some truly amazing women. Two of which, I call my sisters even though we do not share the same parents. We have a sisterly bond that has been tried and tested over the years. We don't always see eye to eye but we support each other. I can always count on my sisters to hear my gripe and bring a new light to the situation. I thank God for them each and every day.

Recently, in craft class, the teenagers and I were discussing women who inspire us. Over the last few weeks the girls have been exploring their options after graduation. It's hard to know at that age what you want to be when you grow up so I suggested that they look to someone who they are inspired by. A sister..... Maybe a friend who has made it through college, followed a dream and found a great job or someone who is going in the direction they could possibly see themselves going in.Or someone who has overcome major obstacles like my sisters. Ask a teenage girl to name a woman who inspires them and you will most likely hear something like "Beyonce or Oprah!" and that's great! Both women are strong, independent women who have made great strides. But I wanted  them to find someone a little closer to home who they could interview. Someone local. This got my wheels turning. I had to ask myself.......

Who inspires me?

Sisters
I'm inspired by the people who follow their dreams, overcome obstacles to achieve their goals. I'm inspired by people who don't stop, never give up! Live the dream! The single Mom who busted ass to raise a family and make it through college to get that degree and run with the big boys! The Mom who single handedly put her kids through college! The young artist who kept focused and followed a dream to be a photographer after she blew the boys out of the water with her tattoo skills. Yeah! I love these women. They are ROCK STARS! They jump lifes hurdles like Wonder Woman! When my day looks like it's turning to gloom these women bring out the sunshine and I can see clearly! They make me want to keep going. They are showing me everyday that it is possible! Dreams do come true. You just have to work for it! So, ladies and gentlemen......Don't give up!

Hazelnut Mocha Bundt Cake

I swore that the crinkle cookies I posted before Christmas would be the last sweet recipe I would post til at least February! Well, I guess I lied. Because here I am, posting this recipe and it's not even January yet!

I was blessed with 2 amazing sister-in-laws! Thank you God! And this Christmas they both helped make the holiday a little better for my children and one of them gave me a gift I've always wanted..........a fancy bundt pan! I'm serious. I have wanted a bundt pan for a very long time. I don't know what it is about a bundt cake. Maybe it's the fact that they don't need fancy frosting or decorative flowers. The shape alone is fancy enough (to me).

Look at that Hazelnut Chocolate Ganache topping! Mmmmm
So, anyway, I made this bundt cake today with the help of my son. I've hurt my back and actually couldn't lift the bowl of cake mix to pour into the pan let alone whisk the ingredients together. He's a life saver! But, this is an easy cake to make. I have been staying away from packaged cake mixes lately, devoting myself to made from scratch cakes and I'm finding that it's actually fun to measure things and follow a recipe. Speaking of recipe.....here it is!

1 (12 oz) bag semi sweet chocolate chips
1/2 cup Nutella plus 3 tablespoons
3/4 cup canola oil
1 cup sugar
1 lg egg
2 cups all purpose flour
1/2 cup cocoa powder
1 table spoon baking soda
3/4 teaspoon salt
1 cup very strong coffee
1 cup buttermilk

  1. Preheat your oven to 350 degrees. Spray your fancy Bundt pan with non stick spray. I was generous with my spray.
  2. In a small sauce pan, melt about 1/4 cup of your chocolate chips over low heat. Stir constantly! Adding your 3 tablespoons of nutella as you go. Once your chocolate is melted pour into a mixing bowl to cool slightly. Make sure you scrape the sides of the pan and get all of the tastey goodness out!
  3. Meanwhile, sift your flour, cocoa powder, baking soda and salt into a separate bowl. Or you can whisk it all together. I like to use my sifter.
  4. Now, back to your melted chocolate......whisk in the oil and sugar into your chocolate mixture until smooth. Then add in your egg. Once you have that all mixed add half of your flour mixture and half of the buttermilk and coffee. Mix until smooth and add in the rest of the flour mixture and buttermilk and coffee.
  5. Pour your beautiful batter into your bundt pan and bake in the preheated oven for about 40 minutes or until a toothpick inserted comes out clean. Once the cake is done, place it on a wire rack to cool for about 8-10 minutes. Do not flip your pan yet!
  6. While your cake is cooling enough to flip.......place the remainder of your chocolate chips in your saucepan, melt on low heat. Make sure to stir constantly! As it's melting add your 1/2 cup of Nutella. You can also add a tablespoon of canola oil to the chocolate mixture if you need to loosen it up a bit. When your chocolate is all melted, remove from heat and allow to thicken up a bit. While this is happening, you can flip your cake out of the pan onto your cake plate or whatever you plan on serving the cake on.
Now that you have your cake out of the pan you can pour your chocolate ganache onto your cake! There's no wrong way to do this! Just let it drizzle all over your cake! No need to smear it around. Just let it slide down the sides and look beautiful!

I used very strong coffee for my recipe! You don't have to use strong coffee if you don't want to! It will taste wonderful either way! And I would also like to say that if you're not a Nutella fan, you don't have to use the Nutella at all! You don't even have to substitute anything, just don't use it! But if you didn't know it was in there, you probably wouldn't be able to pick out the taste! The outer edges of this cake has a nice crunch to it while the inside was super moist! I am not ashamed to say that I ate 2 chunks of this cake! Tomorrow when I get up I'll have a small slab with a steaming hot cup of coffee! Breakfast of champions!

Wednesday, December 21, 2011

The BIG one.

Well, folks! I've hit my 100th post! This is it! I started this venture a little bit over a year ago and said "I'll try it for a year, if I don't enjoy doing it, I'll stop". I'm still going. Not because anybody likes it......I think the jury is still out on that matter. I am going to keep going because it feels like a purpose. One day, long in the future, when I can't remember a thing....I can look this up and say "Oh! I made that and it was cool!".....or "Oh! I do know how to cook".....Or "Wow! Did I really get on the roof with an airsoft gun to hunt down a rogue squirrel?"....."Did I really read 100 books in less than 2 years?".....Why yes I did!

100 posts about absolutely everything I can squeeze out of me....well, maybe not everything because this is somewhat censored! I cook, I craft and I parent with pure passion and slight touch of  motivation. And I do it because it makes ME happy. 
I want to thank every single one of you who have put up with me, followed me, took the time to read what I put out there and laughed with me. You were with me when I faced my fear of teenage girls and became a mentor to them. I am in love with these girls by the way. In the time that I have been doing my craft class with them, one of my lovely young ladies has found a forever home with a wonderful family. Another has moved on to college to become something great. I've learned so much from them. The thing I bring away from them is tolerance. I try to practice it each day...somedays it's a struggle.

I hope you stick around to see what I can get up to next. We read together, craft together and lately we cook together. In the future we'll review a movie or two together! I personally cannot wait to see "One for the Money" and "The Hunger Games". So, here's to the next 100 posts! Feel free to leave a line or two. Say hello! I do like to hear from you! Thanks again for your support! :)

Thursday, December 15, 2011

Crafting with the Toddler

I craft with the toddler often. She starts the mornings off with crayons and a coloring book or paints! Occasionally, she'll dig the jar of buttons off of the shelf and arrange them on the table to make a pretty picture. She is very creative! Well, I was sitting on the couch folding laundry the other day and realized that I don't have one single kid-made ornament on my tree! That is an outrage! I use to have tons of ornaments that my boys made in school and at home! I had so many that I would hang them from garland above the door. But, sadly they were lost in the great basement flood of 2006! It was such a sad day! You can't replace them and now that the boys are teens they are not a fan of recreating them! Double sad! I miss my babies!

I wanted to fix the fact that my tree was lacking character. So I decided to trade the toddlers crayons and paint in for scrap book paper one morning. At first she wasn't happy about it. She loves her crayons! But, once I started to trace her hand on the back of this pretty paper things started to look up!

So, just a quick how-to, since I didn't have my camera when I made these and don't have pictures to follow along with it.......On the back of a patterned piece of scrapbook paper (the back was a solid color otherwise you could glue your cut out onto a solid or print and then cut that out), I traced her hand using a pencil. That way I could erase any lines that might show.

Then, I brought out the glue and lord help me. I am still cleaning glue off of my chair! Originally, I thought I would just let her dip her finger in the glue and finger paint the hand print with the glue but she wasn't having any of that mess! So, I grabbed a cotton swab and let her dip it instead. On the hand print in the picture, I helped! So of course it's all nice and neat. But she used a more artful approach when left to her own devices and she pretty much covered the entire hand print with glue. I had to make sure she didn't take too long with the glue since I didn't want it to dry. I wanted the glitter to stick!

Once the GLITTER came out she was all in! Loving this project to pieces! Yes she was! I'll be cleaning glitter up for a very long time. I don't care! So, she has everything in the dining area coated with glitter. There's no more glitter and  that's her cue to shove off. Leave Mama to do the dirty work once again. I left everything to dry on the table while I vacuumed the rest and swiffered what I could up. I used a hole punch to punch a hole in the cut out once it was dry, for my ribbon. But, on some of them I used fishing line. I don't know why.......I just thought I'd try it out, save some ribbon. You could also use yarn! Or embroidery thread. Maybe string some beads through to make it extra fancy!  You could even trace their hands on a recent picture if you wanted to make it more personalized. The possibilities are endless. On the back of our hand prints I wrote her name and the year so we could keep track. We'll see what it looks like next year! :)

Pizza Casserole

I would call it a success!
Pizza is a common meal in our house. Notice I don't say popular. We eat it more than anything else because it's quick and very easy since it's frozen and ready to pop in the oven..... and I'm sick of it! However, this Pizza Casserole looked very good! It's different! Noodles, sauce, meat, pepperoni and more importantly......Cheese! I found this recipe on a wonderful blog which I am going to share with you so you can check it out and get your own tastey inspiration!


In the morning after breakfast I always have a little bit of quiet time on my hands. Yesterday  morning instead of hunkering down with a book while the toddler enjoyed her own quiet time I decided to brown the ground beef that I would be using. That way it would be less for me to do when dinner time rolled around. It seems like dinner time is the most chaotic hour in my house because everyone is trying to get into the kitchen and talk to me or look in the fridge for something to tide them over til it's time to dig in. One less pot to watch would certainly be helpful! So, I cooked the meat, drained it and put it in the fridge until I was ready to assemble the rest later that day.

I used 2 and a half cans of Hunt's spaghetti sauce (reserving the rest for a different meal), 1 bag of egg noodles (I could eat them cooked without sauce), 3 cups of shredded mozzarella cheese, Pepperoni and  1 and a half lbs of ground beef.

Once the noodles were cooked and drained it was time to assemble. I poured a layer of sauce in the bottom of my 13x9 or 9x13 pan and added half of the noodles.......

Then half of the meat and topped that with cheese. Go ahead and Pour sauce on it........Then more noodles, more cheese. Then the rest of the meat......Then the rest of the sauce.......

Now the important part......A Generous amount of CHEESE and PEPPERONI!!!!

Before you pop this into your preheated oven (350) cover it with foil! Bake 30 minutes. Uncover and bake an additional 15. For a thorough how-to head on over to the for mamas blog! She's absolutely right! It is very tastey! My Husband had 3 helpings! I think it's very filling. We had leftovers which I am sure will be even tastier tomorrow! Can't wait!

Over all, I thought this was easy to make! There's a lot of layering involved but it's not that difficult. It looks a little soupy in the photo at the top but it really wasn't!  I think the next time I make it, I will cook up some chopped onion with the ground beef because I do enjoy onions. I just won't tell the rest of the family since they don't love them.........I was also thinking that you could most certainly try this with chicken and alfredo sauce and still top it off with pepperoni.....Maybe add a little broccoli.....Ooooh! My wheels are turning. Well, hope you take the leap and try this for yourself! :)