Me being Mom

Me being Mom
photo by Anna Marie Pictorials
Showing posts with label Cooking. Show all posts

Wednesday, November 14, 2012

Nutella fudge


<<<<Yes, that's the start of a beautiful thing. Nutella Fudge! I searched the Internet for a recipe that I was willing to tackle. My supplies are limited so I didn't want a recipe that called for a ton of sugar and etc. Pinterest has a few recipes but they gave me the run around. It seems like I clicked on one and it took me to a site that didn't have the actual recipe for the fudge. The next link took me to a recipe but never actually told me how much I needed of each ingredient. So, after much searching I finallygave up and contacted my good friend who also makes candy and this is what she sent me.
 
    1 can sweetened condensed milk, 1 tsp of vanilla extract, 8 oz of semi-sweet chocolate chips, 1 cup of Nutella and 3 tblsp of unsalted butter. Butter spray to coat your pan. She also suggested a double boiler and parchment paper and I'll get into that in a bit but first let me tell you how bad this idea was...making fudge. It was a bad idea because now I'm home alone with a batch of Nutella fudge and I've just realized that you can drop one of these cubes in with your cup of coffee and it is a beautiful thing.
 
 
   OK. So, you've got all of your ingredients. I literally killed an entire 13 oz jar of Nutella while making this. A cup of Nutella is pretty much most of one jar and then I had to have a few spoon fulls because that's how I do it. I do not own a double boiler thingy. My Mom gave me one once a long time ago and I had no clue what to do with it. I sold it in a yard sale like an IDIOT. Last night, since I was an idiot I used a small soup pan of water and a glass mixing bowl as my double boiler. Umm, It was not my favorite thing to do because my bowl wouldn't hold still while I was stirring and I had to hold on to it when it got hot but I'm over it. It worked in the end! Now, as far as the parchment paper, I don't buy it. I'm just too cheap. And to be honest, I had no problems getting this fudge out of the pan! Trust me!
 
 
    Alright, basic run down of what you're going to need to do. In my 8x8 pan I sprayed a generous coating of my cooking spray. I used butter flavor because who wants your fudge to taste like canola or olive oil. Not me. Spray that pan and set aside. Then, combine your other ingredients. I cut my butter into small chunks to help it melt faster. So, in my soup pan I have water already warming on the stove. I placed my mixing bowl of tasty goodness on top of the pan, don't let the water touch your bowl or it will scorch your stuff! I won't lie and tell you that I stood there and watched that stuff non-stop. I stirred it, walked away, watched a few minutes of whatever the kids were watching and then stirred the stuff. It might seem like the ingredients will never smooth out but don't worry, it does! I was careful not to over heat the stuff and cause the chocolate to seize. So when it was smooth and creamy I poured the thick chocolaty goo into my 8x8 pan and spread it out. It's thick! When you have it spread out in the pan you can put it in the fridge and let it set over night or all day. I did this before bed because otherwise I would've cut into it before it was fully set.
 
 
    To make cutting it easier, I ran my knife under hot water and then cut that fudge like it was BUTTER! I used a spatula to get it out of the pan and had no problems at all. I read in other recipes that you could sprinkle a little sea salt on the top and I bet that tastes good but all I had was kosher salt so I didn't try that. I did however drop one of these cubes in a cup of plain old coffee and let me tell you, it was delicious!! I bet it's just as good in a warm mug of milk!! 

Sunday, January 22, 2012

Lovin' from the Oven

Let me start by saying I am so sorry! Because if you're like me and you love cinnamon buns you're going to try these tasty rolls and not be able to stop eating them! But, I'm getting ahead of myself.

First off........Let me tell you a little something about my Mom.

One of the smaller rolls.......It's not small at all!
She makes the best bread! I can't make bread. There's something about the kneading and rising and yeast and all that that doesn't agree with me. It never rises and it's just too much like chemistry. I failed chemistry!  So I stay away from it. But as I was killing time in the frozen food section of our local grocery store I ran across these frozen cinnamon rolls. It could just be coincidence but I was just thinking of how much I missed my Moms home made cinnamon buns! [exhale] Sooooooo goooooood! She would start with all of the ingredients she needed, mix it all together, throw in a pinch of love, let it rise, roll it out, add some Cinnamon and brown sugar.....or whatever it is that makes them ooey and gooey and in the end we would have these beautiful cinnamon buns that melt in your mouth. You could go get a can of cinnamon rolls and make those but it's just not the same. They aren't soft and chewy and it seems like they get hard if you let them set out for a while. Anyway.

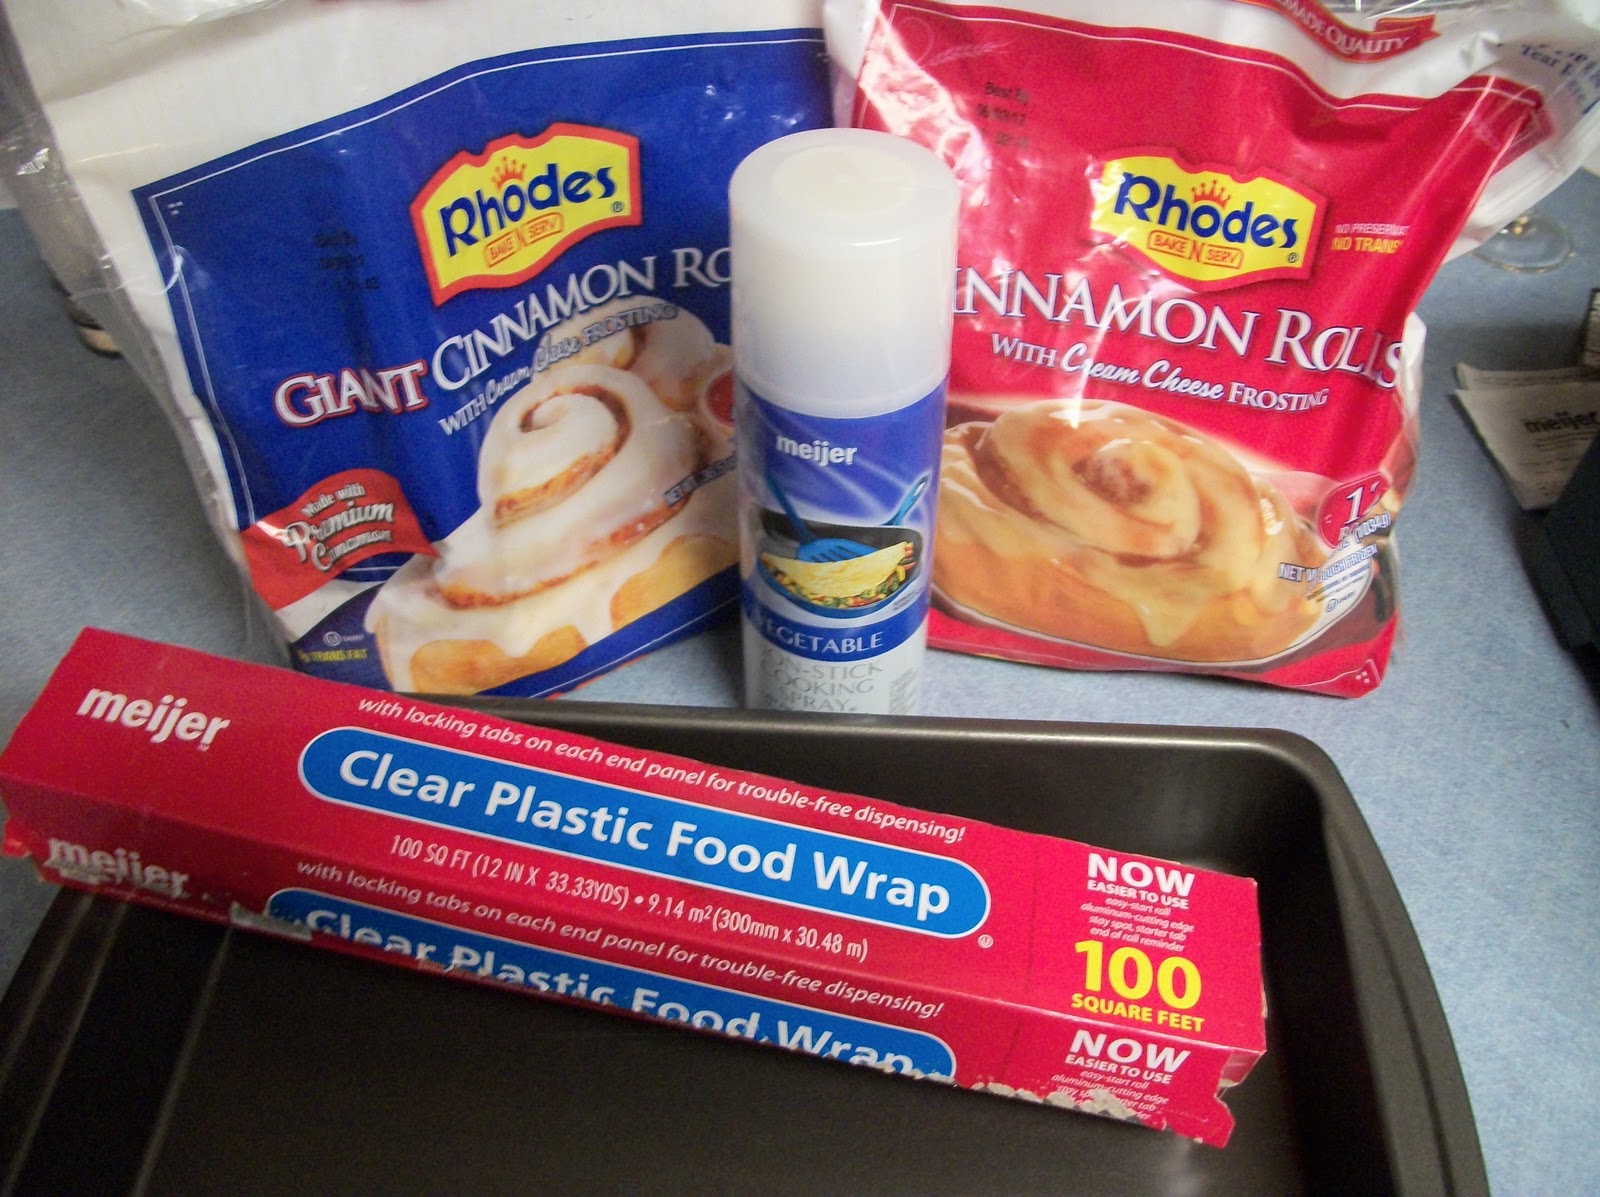
I miss my Mom. I'd have to drive 12 hours to get a taste of her cooking. So, when I ran across these buns I said, maybe this is the next best thing. So, I bought a bag and made them. It was so easy! You just pop them on a sprayed pan, cover with plastic wrap (sprayed with cooking spray) and let them sit on your counter for 4-6 hours to rise. That was the fun part......watching them get enormous! The hardest part of the process was spraying the plastic wrap. For some reason my common sense shut down when it came time to do that part and I tried to spray the cooking spray on the plastic wrap before I even ripped it off the roll.....anyway, it was a mess. So, I threw that disaster in the trash and started over, ripping a piece of plastic wrap big enough to cover the pan off, layed it on top of the pan like I was covering it, then I sprayed the plastic wrap with spray and flipped it over to fit on top......etc. etc. You know what I mean right?


The smaller rolls, frozen, ready to rise!

You might be asking, "What's the difference in the blue bag and the red bag?" Well, I'll tell you.....The red bag has 12 small rolls and when I say small rolls, I mean bigger than your fist! The blue bag has 6 rolls that are bigger than a tea saucer! The things are HUGE! I should also mention they come with a couple packets of icing. You just thaw it on the counter while the rolls are rising.
So, here you see 9 rolls, fresh from the freezer, placed in a cake pan that has been sprayed with cooking spray and then covered with the plastic wrap that I had a hard time spraying.....I'm not perfect remember!

smaller rolls ready for the oven! mmmm
I placed the pan of rolls on my kitchen counter and left them there all day to thaw and rise. I didn't think they would get much bigger but it turns out I was wrong! -----------> Pre-oven!

I think it's safe to say there will be enough to feed my 2 teenage boys, my husband and my appetite for homemade cinnamon rolls!

Over all, these rolls, are perfect. The price was right. (Under 4 bucks) They were very easy to make! Smelled great! Tasted almost as good as my Moms rolls and put a smile on my face. If you love a fresh baked cinnamon roll but lack the talent, like me, you have to try these! And no! The company is not paying me to give this product 2 thumbs up! But I wouldn't turn down a couple bags of these rolls if they wanted to send them to me!

Thursday, December 29, 2011

Hazelnut Mocha Bundt Cake

I swore that the crinkle cookies I posted before Christmas would be the last sweet recipe I would post til at least February! Well, I guess I lied. Because here I am, posting this recipe and it's not even January yet!

I was blessed with 2 amazing sister-in-laws! Thank you God! And this Christmas they both helped make the holiday a little better for my children and one of them gave me a gift I've always wanted..........a fancy bundt pan! I'm serious. I have wanted a bundt pan for a very long time. I don't know what it is about a bundt cake. Maybe it's the fact that they don't need fancy frosting or decorative flowers. The shape alone is fancy enough (to me).

Look at that Hazelnut Chocolate Ganache topping! Mmmmm
So, anyway, I made this bundt cake today with the help of my son. I've hurt my back and actually couldn't lift the bowl of cake mix to pour into the pan let alone whisk the ingredients together. He's a life saver! But, this is an easy cake to make. I have been staying away from packaged cake mixes lately, devoting myself to made from scratch cakes and I'm finding that it's actually fun to measure things and follow a recipe. Speaking of recipe.....here it is!

1 (12 oz) bag semi sweet chocolate chips
1/2 cup Nutella plus 3 tablespoons
3/4 cup canola oil
1 cup sugar
1 lg egg
2 cups all purpose flour
1/2 cup cocoa powder
1 table spoon baking soda
3/4 teaspoon salt
1 cup very strong coffee
1 cup buttermilk

  1. Preheat your oven to 350 degrees. Spray your fancy Bundt pan with non stick spray. I was generous with my spray.
  2. In a small sauce pan, melt about 1/4 cup of your chocolate chips over low heat. Stir constantly! Adding your 3 tablespoons of nutella as you go. Once your chocolate is melted pour into a mixing bowl to cool slightly. Make sure you scrape the sides of the pan and get all of the tastey goodness out!
  3. Meanwhile, sift your flour, cocoa powder, baking soda and salt into a separate bowl. Or you can whisk it all together. I like to use my sifter.
  4. Now, back to your melted chocolate......whisk in the oil and sugar into your chocolate mixture until smooth. Then add in your egg. Once you have that all mixed add half of your flour mixture and half of the buttermilk and coffee. Mix until smooth and add in the rest of the flour mixture and buttermilk and coffee.
  5. Pour your beautiful batter into your bundt pan and bake in the preheated oven for about 40 minutes or until a toothpick inserted comes out clean. Once the cake is done, place it on a wire rack to cool for about 8-10 minutes. Do not flip your pan yet!
  6. While your cake is cooling enough to flip.......place the remainder of your chocolate chips in your saucepan, melt on low heat. Make sure to stir constantly! As it's melting add your 1/2 cup of Nutella. You can also add a tablespoon of canola oil to the chocolate mixture if you need to loosen it up a bit. When your chocolate is all melted, remove from heat and allow to thicken up a bit. While this is happening, you can flip your cake out of the pan onto your cake plate or whatever you plan on serving the cake on.
Now that you have your cake out of the pan you can pour your chocolate ganache onto your cake! There's no wrong way to do this! Just let it drizzle all over your cake! No need to smear it around. Just let it slide down the sides and look beautiful!

I used very strong coffee for my recipe! You don't have to use strong coffee if you don't want to! It will taste wonderful either way! And I would also like to say that if you're not a Nutella fan, you don't have to use the Nutella at all! You don't even have to substitute anything, just don't use it! But if you didn't know it was in there, you probably wouldn't be able to pick out the taste! The outer edges of this cake has a nice crunch to it while the inside was super moist! I am not ashamed to say that I ate 2 chunks of this cake! Tomorrow when I get up I'll have a small slab with a steaming hot cup of coffee! Breakfast of champions!

Wednesday, December 21, 2011

The BIG one.

Well, folks! I've hit my 100th post! This is it! I started this venture a little bit over a year ago and said "I'll try it for a year, if I don't enjoy doing it, I'll stop". I'm still going. Not because anybody likes it......I think the jury is still out on that matter. I am going to keep going because it feels like a purpose. One day, long in the future, when I can't remember a thing....I can look this up and say "Oh! I made that and it was cool!".....or "Oh! I do know how to cook".....Or "Wow! Did I really get on the roof with an airsoft gun to hunt down a rogue squirrel?"....."Did I really read 100 books in less than 2 years?".....Why yes I did!

100 posts about absolutely everything I can squeeze out of me....well, maybe not everything because this is somewhat censored! I cook, I craft and I parent with pure passion and slight touch of  motivation. And I do it because it makes ME happy. 
I want to thank every single one of you who have put up with me, followed me, took the time to read what I put out there and laughed with me. You were with me when I faced my fear of teenage girls and became a mentor to them. I am in love with these girls by the way. In the time that I have been doing my craft class with them, one of my lovely young ladies has found a forever home with a wonderful family. Another has moved on to college to become something great. I've learned so much from them. The thing I bring away from them is tolerance. I try to practice it each day...somedays it's a struggle.

I hope you stick around to see what I can get up to next. We read together, craft together and lately we cook together. In the future we'll review a movie or two together! I personally cannot wait to see "One for the Money" and "The Hunger Games". So, here's to the next 100 posts! Feel free to leave a line or two. Say hello! I do like to hear from you! Thanks again for your support! :)

Red Velvet Crinkle Cookies

You know I'm on pinterest every chance I get. I think it's a wonderful thing. Do I waste my time by browsing on pinterest? Heck NO! I gather a wealth of inspiration from pinterest! It gets my wheels spinning. Lately, I've been drooling over all of the yummy cookie recipes that everyone has been sharing. Thanks, by the way! If you follow my food board you probably noticed that it wasn't gathering many meal pins lately.....mostly tastey sweets! I'm trying to balance that out but before I do I want to post one more cookie/sweet recipe that I have recently toyed with.

My husband and I married back in August! Ahhhhh! Good times! He didn't have a whole lot to say about the wedding itself. He was more than happy to let me take the reigns and just run away with things. As long as I didn't ask for a lot of money. But, one thing he did say he wanted was a red velvet cake! I had no problem with that! As a matter of fact, there's a local Bakery called Sandra Kay's that makes the best Red Velvet Cake! My mouth is watering just thinking about it! So, I paid her a visit she loaded me up with a couple pieces of her tastey creation to take home to the hubby and believe it or not I managed to save him a bite or two. He fell in love with the cake and gave the thumbs up. So, I ordered our cake! It was small and beautiful. The best part, besides the tastey goodness of it.......It was very affordable! Thank you to my Mother-in-law for paying for it! I love her!

So, anyhooooooo, I keep seeing these wonderful crinkle cookies everywhere on pinterest! What is it about these cookies? I mean, they look so fun! Can cookies look so simple yet fun at the same time because when I look at these cookies I feel happy and knowing that they are somewhat easy to make, well that really makes me happy! I wanted to try to make Red Velvet Crinkle Cookies in honour of my recent nuptials! And this is how I did it:

5 ingredients
You'll need:

A box of Red Velvet Cake Mix
2eggs
1 teaspoon baking powder
1/2 cup vegetable oil
2 cups powdered sugar


Preheat your oven .....350. Spray your cookie sheet with no-stick spray!

In a mixing bowl, mix the cake mix and baking powder together. I used a fork to make sure all of the lumps of cake mix were eliminated. Otherwise when you finish the next step you'll find it hard to mix it all thoroughly. Now add the eggs and the oil, mix til well blended.

(This is where I assembly line it, if you have an extra pair of hands.) Using a tablespoon, scoop out dough and form into balls. Then drop your dough-balls into a bowl of powdered sugar. Generously coat the balls with the powdered sugar. My son, scooped and formed the balls and I took care of the powdered sugar, making sure the majority of the powdered sugar stays on the balls.

Red Velvet Crinkle Cookies
Place the coated dough balls on your cookie sheet. Bake for about 10-12 minutes. Allow 3-4 minutes for cooling time on the pan. Then remove to a cooling rack. This recipe made just over 3 dozen cookies!

These are the best! Seriously! The powdered sugar gives these the right amount of sweetness. I love sweets but I don't want the sweet taste to overpower the flavor of the cookie and you will certainly not have that issue with these cookies! I hope this inspires you to make cookies. You could make these with any flavor of cake mix. I wouldn't mind trying carrot cake mix! Ooooh!

*Note: After I made these I had a thought. Instead of spraying the cookie sheet with cooking spray, it would be best to use parchment paper since the powdered sugar will soak up the spray! I didn't have parchement paper on hand when I made this batch! But when I made a chocolate version, I did use parchement paper and they turned out so much better!

Best Pork Chops Ever!

I have recently started using my crock pot again. I bought a new one a few years ago when I was pregnant and craving bean soup, used it once and then hid it away in the cupboard, never to be seen again. Then I got busy.  Making a good meal was becoming difficult to squeeze in to the schedule. Plus, I have days where the little bit of motivation I have goes into laundry and straightening my hair. So, I don't want to cook. For some reason though I don't see cooking in the crock pot as putting out a lot of effort! Maybe it's just me.

I put the word out that I was looking for some tastey crock pot recipes. A friend of mine messaged me that she had the best pork chop recipe that I should try. She told me it was called Ranch house pork chops. I looked it up on pinterest and indeed.....the tastey pork chops were everywhere! It seems she isn't the only one that thinks the recipe is worth sharing. I changed her recipe up a bit though. Hers calls for real potatoes that you place in the crock pot with the chops. My family is more of a fake mashed tater family. So, I buy the pouches of mashed potatoes where you just add water! That's pretty simple.

I actually had 3 ingredients to throw in the crock pot:

Yes! I'm the frugal Mom who buys the clearance meat.....
Pork Chops.....I used 8! Boneless because I don't like the bones....Duh!  
1 10oz can Cream of CELERY soup
1 packet Ranch Dip mix

I tossed the pork chops in the crock pot, mixed the soup and Ranch mix together in a bowl. Then poured the soup mix over the chops. Place the lid on the pot, set at low and at my 4 hour mark I tested the chops. They were done. Practically falling apart! The gravy this made was absolutely wonderful! I turned the crock pot off and left the lid off while I made my cheater mashed potatoes and a side of broccoli. You won't see any broccoli on the plate in the picture because by the time I got around to making a plate to photograph the green trees were all gone! I'm considering growing my own next year! We go through a lot of broccoli!

I can tell you right now that I will be making this recipe often. Maybe playing around with it a little. I'm thinking that brussel sprouts would be darn tastey cooked in the soup and ranch mix! You could even make this with chicken instead of pork if you wanted! What is your favorite crock pot recipe!? Please share!

Thursday, December 15, 2011

Pizza Casserole

I would call it a success!
Pizza is a common meal in our house. Notice I don't say popular. We eat it more than anything else because it's quick and very easy since it's frozen and ready to pop in the oven..... and I'm sick of it! However, this Pizza Casserole looked very good! It's different! Noodles, sauce, meat, pepperoni and more importantly......Cheese! I found this recipe on a wonderful blog which I am going to share with you so you can check it out and get your own tastey inspiration!


In the morning after breakfast I always have a little bit of quiet time on my hands. Yesterday  morning instead of hunkering down with a book while the toddler enjoyed her own quiet time I decided to brown the ground beef that I would be using. That way it would be less for me to do when dinner time rolled around. It seems like dinner time is the most chaotic hour in my house because everyone is trying to get into the kitchen and talk to me or look in the fridge for something to tide them over til it's time to dig in. One less pot to watch would certainly be helpful! So, I cooked the meat, drained it and put it in the fridge until I was ready to assemble the rest later that day.

I used 2 and a half cans of Hunt's spaghetti sauce (reserving the rest for a different meal), 1 bag of egg noodles (I could eat them cooked without sauce), 3 cups of shredded mozzarella cheese, Pepperoni and  1 and a half lbs of ground beef.

Once the noodles were cooked and drained it was time to assemble. I poured a layer of sauce in the bottom of my 13x9 or 9x13 pan and added half of the noodles.......

Then half of the meat and topped that with cheese. Go ahead and Pour sauce on it........Then more noodles, more cheese. Then the rest of the meat......Then the rest of the sauce.......

Now the important part......A Generous amount of CHEESE and PEPPERONI!!!!

Before you pop this into your preheated oven (350) cover it with foil! Bake 30 minutes. Uncover and bake an additional 15. For a thorough how-to head on over to the for mamas blog! She's absolutely right! It is very tastey! My Husband had 3 helpings! I think it's very filling. We had leftovers which I am sure will be even tastier tomorrow! Can't wait!

Over all, I thought this was easy to make! There's a lot of layering involved but it's not that difficult. It looks a little soupy in the photo at the top but it really wasn't!  I think the next time I make it, I will cook up some chopped onion with the ground beef because I do enjoy onions. I just won't tell the rest of the family since they don't love them.........I was also thinking that you could most certainly try this with chicken and alfredo sauce and still top it off with pepperoni.....Maybe add a little broccoli.....Ooooh! My wheels are turning. Well, hope you take the leap and try this for yourself! :)

Wednesday, December 14, 2011

Show me the Yummy.

So, I'm in the cooking rutt that people find themselves in every once and a while. I find that this happens when I am running low on cash. Being creative with my dollars isn't always easy in a house full of picky eaters. But like my sister says "Picky eating is for rich folks!". And I swear I will make a sign for my kitchen that says just that! lol. It's true! We don't have the luxury to be picky! Take it or leave it for me to eat and get fat on!

Desserts is "Stressed" spelled backwards.
Lately, I have found that pinterest is not just for gazing at Hairstyle how-to's or DIY projects! There are tons of recipes on there! I think I spent an entire hour looking at recipes yesterday! I was so inspired by the time dinner rolled around! BUT I ended up making one of the good  old stand by meals that I know everyone will eat.....Dirty Rice! It was tastey! But not epic! I'm looking for that epic recipe that the whole family will go on and on about, begging me to make it every single day and not only making it each day but making a double batch! That would be great! I can't remember the last time I made that kind of meal! [exhale]

So, I've made a list of recipes that I want to make. These recipes all came from pinterest (but from different blogs)! I'm going to make a few and let you know how they faired! Here's a list of them!

  1. Pizza Casserole: made with egg noodles, ground beef, ragu, mozzarella and pepperoni.
  2. Chicken Enchiladas with Green sauce: it kinda speaks for itself!
  3. Crockpot Ranch house Pork Chops: Dry Ranch Dressing Mix and Chops.....easy!
  4. Tater Tot Casserole: Is probably not really a meal but it has ground beef so I'm going to say "MEAL"
Now keep in mind.......Even though those meals don't scream healthy I "veg" them up! Add a little broccoli here and there. Or perhaps you like green beans! My toddler has fallen in love with cooked carrots! I just boil up some baby carrots, add a pat of butter and salt and pepper. She loves them. Even dips them in ketchup! I've recently been on a black eyed pea kick.

Anyway, as soon as I test out these recipes I will let you know how they turn out! In the meantime, check out pinterest for some of your own tastey inspiration! But be careful! It's highly addictive! :) If you look to your right..... above the picture of the adorable kid in clown makeup....you'll see a link to my boards on pinterest!! Follow ME!